Simple Christmas decorating


  Margaret Ryall

We all have our Christmas rituals and mine usually start December 1st..  I  always make something for my entrance first.   I am not one to overdo things.  I re-use what I have or forage in  my garden or the gardens of friends. Then I added some LED lighted twigs and silver balls and a hit of mesh ribbon.   The purple connects with my front door. The blown leaves remind me that we are between seasons.


Margaret Ryall

 Each year I allow myself one  or two new purchases and send at least one small bag of assorted objects to a local charity shop.   I'm extravagant this year with two purchases.  I've been looking for a plain wreath to change around each year and found this great one with LED lights  for 25% off at Canadian Tire.  This year the theme is snow flakes and silver... just because.

 
 Margaret Ryall

 This year I embraced our new Target ( very near my home) and purchased three  dark silver vases that you will be seeing around my house through out the coming seasons.  I love repetition in threes as you can see.   A little sparkle with red is refreshing.


   Margaret Ryall

I have a fondness for trays to corral objects into a composition.  This lovely white one was a gift from my husband last year. It has silver leaf leaves and birds on it (see below). 

Candles are always a must at Christmas time and I usually arrange those I have on a tray, add in some flowers and ornaments and call it a day.  I am still fiddling with this arrangement and I may need to invest in some new candles  because these are looking a little worn.  There's nothing like a photo to help you refine a composition.   The finials are going and I must put in one more pillar for a chubby candle.     Love plain white mini carnations because they last forever.


 The new  version with finials removed. Looking better.  Every time I pass by I move something!

That's it until December 14 when I usually add the second layer of decoration and put up the tree.

I hope you are putting a little sparkle in your home. 

8 Ways to fill empty corners

The four corners of a room are often a no man's land when it comes to design.  I am not saying that you have to fill up every corner with something, but I am advocating thinking about your space to determine if  it might need to look more "fulfilled". Here are some of my favourite solutions:

Art 


8 Ways to fill empty corners
Using Art to fill an empty corner
Margaret Ryall

 Usually you can't walk right up art you place in a corner,  so choose something that can be read from a distance. This lovely matted and framed wood sculpture is stunning for corner purposes.  It brightens up the space, fills it nicely, provides a backdrop for the dark table and lamp base and is a bit of a conversation piece. I was so excited when it was hung on my clients' wall.  


 using art to fill empty corners

This colourful mid century modern space needs art work to match.   It creates another layer for the space that invites the eye to roam and then return to the equally colourful lamp and chair. 


 Round table and two chairs


two chairs round table  in  corner
Houzz

Round tables are great for corners because they allow you to fill the awkward space and at the same time move your eye around so you don't get stuck there visually. The addition of the lamp provides the third height thus creating a more interesting design.

Tall  floral arrangement


round table and ottomans foyer

 When you have the height why not go for it and use something tall to fill the space.  Again a round table is the mainstay for  this foyer area. 

 Built in bookcase 


corner bookcase workspace
Vicente Burin Architects

This beautiful set of bookcases  tucks effortlessly into a corner.  The colour adds to the whole space and the minimal arrangement of objects and books ensures it isn't too busy. 

Chair and floor lamp 

 
vignette chair ottoman lamp corner
 Cravotta Interiors

A round floor lamp behind a chair is a perfect and quite functional solution for a corner. 


chair ottoman floor lamp in corner
 Houzz


In larger spaces the addition of a round table helps to fill the corner and provide variety in heights. 

 A  workspace 


desk chair art in small space
Siemasko + Verbridge

Tidy and interesting  art too. 


built in office desk under stairs
  Leslie Goodwin Photography

Or perhaps a larger space to make use of a corner under a stairs.  


 built in  workspace desk in corner
SchappacherWhite Architecture D.P.C.

Large scale vases/urns


large urns in dining room
InHouse Design Studio

Sometimes you need a certain something to complete a design and these two large scale floor vases do just that.  Imagine the space without them.  


large vase with greenery and sticks kitchen

 This arrangement is not in a corner, but it very well could be.  Rather than bamboo you could use birch sticks if you wanted a more rustic look.

 Corner mirror and two chairs


corner with two chairs table and mirror

Love this solution because it expands the space making it seem like it goes on forever. The glitz and sparkle doesn't hurt either . 

Then there's tall plants, built in benches, screens .... The list is as long as your imagination.  Do you have any bright ideas for filling corners?

Accessories: Making it all work

 Decorators get all kinds of requests for services from furniture layout to full home designs. I like the variety of smaller jobs with  the ones that go on forever.  Two of my favourite tasks are rehanging art to best advantage and providing the last layer of accessories in a home. Sometimes I get to do both in the same house!

Over the next several posts I want to provide a glimpse into the thought processes I use when accessorizing a client's space.   Think about it as adding the icing to an already great cake. If you do it for your own home or as a professional service, the task is really the same. You have to juggle design principles with individual taste (both decorator& clients) and existing elements in the home.

 Sometimes homeowners have  objects  to incorporate in the design and other times you may  start with a clean slate.   As a decorator, I find  a  clean slate  more difficult  because I want to choose accessories that are "sensible" for the homeowner.  By that I mean  I want to select objects that relate to  family composition, budget, existing objects  and  interests.   Here's a little of how it goes.....

Use what is important to you

Re-use objects from other rooms

Mix shapes and scale

accessories: Making it all work

 This is a perfect example of  how existing objects  can  form the backbone of a great vignette.  The crystal vase was a wedding gift and  the lamp was in another room, but the scale was too small for that space. The homeowners had the mirror from their previous home.  When I saw the silver cut edged design in the frame that  mimicked the cuts in the crystal, I knew it would work.  I have to admit I am a firm believer in giving  new life to "previously loved" things.

There is  variety  in the  shapes in this vignette.  The major objects (table and mirror) are rectangles,  the bottle, vase and lamp are cylinders, the ceramic bowl a softened square.   Spheres are introduced in the top of the bottle and the floral shapes.  The leaves serve to soften all the shapes with their lovely droop.

 Have a mix of warm and cool tones


The homeowner wanted something to put keys in so the soft white ceramic bowl with a  coppery/bronze interior was chosen.  If everything is silver why add  warm tones ?  I like to mix metals for interest.  The jar behind  the bowl is mercury glass and it has a bronzy metal top- both work with the warm tones in the orchids.   So three cool tones and three warm tones.   I always mix warm and cool. 

Choose an accent colour from other objects or art

Move the accent colour around the vignette and the  larger space 

 Pay attention to the geometry in a space


Move  colours around the vignette.  This is a must for success.  When you have a mirror and a small space you can depend on what is on the opposite wall to add to your vignette.   You can see glimpses of  the opposite side of the porch  in the mirror. 

Choosing an accent colour
All the walls on the main floor are a cool blue gray.  You already know I like to mix warms and cools in any scheme, so I wanted a warm colour to offset the cools.   The first thing I chose for this room was the art. The pillow was second. The art was chosen based on what I observed hung in the home on my first visit. Two of the pieces had orange as a primary colour and both had elements of  landscape in them.  This is a more interpretative landscape which is also usually  a safe purchase.  The lines of design in the painting  bring the viewer in an up thus adding depth and height to this small space. it works well with the scale of the bench and the the nine foot ceiling.

I couldn't pass up the repetition of the back shape of the bench in the pillow.  It serves to break up the dark in this small space and moves your eye around.  I also love how the diamonds duplicate the linear quality of the trees but in a more complicated way.

 Choose items that can work in several formations


 If you choose your objects wisely you can move them around and add seasonal items to the decor when needed. And most importantly of all do not get over stressed when things mysteriously get bumped or shoved off centre as the table in the above shot!  People live there.   


And that is why homeowners call a decorator!

Are you feeling blue?

Hopefully you are into blue!  Blue seems to be a dominant colour in Pantone's colour forceasting for  both spring 2013 and upcoming 2014. Here's how it's playing out....

 Monaco Blue (Spring 2013)

 Dazzling Blue (Spring 2014)

Two blues, but with great differences.  I can't say blue is a big favourite of mine, but I am really into Monaco blue because it is a warmer blue that is approaching navy. I don't think it is a blue that you would  catagorize as trendy. Perhaps timeless would be a better descriptor.   Dazzling Blue seems to be a colour that will not be  around for the long haul.  It is cold, quite exciting ,and lends itself well to accessorizing.   It isn't exactly a colour you snooze to.  Could you have it on a wall?  Not me, but there are those who would.  

You could use it a little or go whole hog and saturate your space with it. 

 Welcome to the world of dazzling blue....


 .... put it on the outside


on furniture or pillows...

 I really like it mixed with various grays and all that texture.  Both serve to tame it down a little.  You will notice quite a bit of colour variation in the blues above. Mixing a more vibrant dazzling blue in with "tamer" blues seems to be a good solution if you aren't into bright. 


on a wall....

 Whenever I see these fresh, intense blues my mind goes to warm countries like Greece.  Since I don't live in one, it could explain why I am having trouble warming up to this selection.


or a poof...

This is a truly dazzling accent piece that could find a home in most decors.


 in glass or flowers...

and tile ...


on chairs ...

 or bowls...


 or a pillow with lots of other fun colours. 


And here it is with Celosia orange another Pantone selection for spring 2014.


These colours  show up on the runway too! 


Which type of blue decorator are you?


The making of an interior decorator

  What's your interior design aesthetic?
             "
"What's that you ask?  Design aesthetic?
Should I have one ?  Perhaps I do! " 

This is not a question I could have answered in my teenage years, but it was those early years that laid the foundation for what I would come to understand and appreciate about design in my adult life.

 I believe our  interior design aesthetic (aspects of interior environments we are attracted to) is developed from what we've been exposed to  through our life experiences:  the house we grew up in,  homes of friends, your home town, reading, travel, and various forms of  media, etc. 

 The road to my house just before my birth

My house age 8

 Is this a town that raises a design conscious gal? 

"Yep!" 
 How did that happen?

I was exposed to very functional decor growing up in a small town in Newfoundland in the the  50's and 60's, but there were always  handcrafted  items in our home and I was encouraged to participate in their creation. There always seemed to be lots of scraps of wool, fabric and thread around.  I  appreciated what an individual could create with very modest materials, and I  believed at an early age that I could create anything I wanted.  That's a pretty powerful beginning.

The Singer sewing machine got lots of use in our home. It was a sound I did homework to, read to and even made it hum myself. 

What came off it was varied: curtains, quilts, bedspreads, and even mini skirts and tent dresses. Fabric remnants came from family members in New York.  That link assured I was current in textile designs! When not sewing I was busy with  crocheting , knitting , and hooking  rugs. All added warmth to our home.


At 13 I discovered the library in the next community and my design world expanded. 


Good Housekeeping

 There were books and magazines  that took me well beyond the small town I grew up in.  I devoured them, imagined, sketched, and rearranged our bedroom (with my sister's help) numerous times.  Mom took it all in stride. 


 Quite the design statement!  I had nothing to do with this decor, but I did make the dress! Not bad for a 15 year old.  At the time, I thought I would be a fashion designer, but good old Newfoundland practicality took over. 


TV programming added to my understanding of what was in style. I jet setted around the world with The Man (Men) from Uncle without ever leaving my living room. 

 And got my first taste of that famous British style on the Avengers. 

What we now refer to as Mid Century Modern design was in its prime in my formative years.  For the youngun' reading this think  Mad Men. 


When I was 19 I spent the summer in New York. It was a trip of firsts.  First time I went to large department stores,  first time to see art galleries,  first play.....   And what about what I saw on the streets and in store windows?  It all went in and somehow came together into a feeling, a sense of what I liked and wanted in future interiors.While this type of decorating was happening in New York....


Albert Hadley, New York, 1971

The average homeowner was living in this.

That was a pivotal time in my understanding of the broader world and the vast discrepancies among the homes I was used to and the homes of the "out of reach". I began to read more and think about what elements and principles interested me  in the designed interiors I was viewing on TV and reading about. My design aesthetic was forming.  

In 1973 I got my first apartment and  it had a lively colour scheme of white with red and navy accents.  All very fresh and simple.   All second hand and dressed up with lots of covers and paint.   I moved from being a university student to a teacher - a different kind of designing! I continued to read about design and do lots of DIY projects. 

It wasn't until the mid 80's that I decided to study interior decorating and it would be another twenty years before I officially advertized as a decorator.  I would contend I was always one. During that time I also began to paint.  It was this activity that honed my colour sense and gave me a firm understanding of the elements and principles of design. 

 My design interests today can be traced back  to my roots as a mid century modern girl.  I still love clean design without too much "fussy".  I like  furniture with straight lines,  geometric motifs especially circles, lots of texture, light colours, hand made items and abstract art.  I describe my look  as casual contemporary with a quiet edge.

What's your design aesthetic?

Design Solutions: A bed between two windows

Work is keeping me quite busy over the last several weeks and blogging always drops off when this happens.  I'm beginning a series of posts called Design Solutions that will  address common design issues that often crop up when I work with clients.This is a great way for me to come to  terms with options and at the same time it provides a written commentary that I can send clients to in the future.  If I can help my readers in any way, it's a bonus.

Being a lover of asymmetrical balance, I can't explain why I am so attracted to the placement of a bed between two windows.  But I am. The windows become part of a larger design tableau in such instances, and the whole wall must be considered as a unit including headboard, night tables, lamps, table vignettes, art, window treatments and bedding.   Here are several guiding principles to keep in mind.

 Keep it symmetrical


When you start with a layout that is symmetrical, it works best to continue using this form of balance in your design .


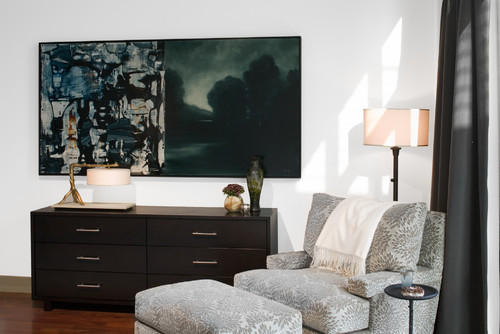
Consider  your headboard shape when choosing art

  No headboard

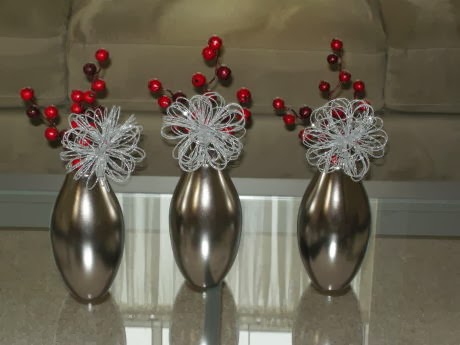
 The height  and shape of your headboard will dictate what you place over it .  When you have no headboard you have to choose something that will fill the space well, and circular shapes with lots of texture and warmth are brilliant.

High headboard

The pillows act as  the center of interest in this layout of high headboard framed by draperies.  No art is needed.


Many designers are attracted to  groupings of three objects (art) between two windows.  This is an option, but not one I usually advocate.  When there are too many rectangles my eye craves  something curved or solid. In this room  the art reaches the top of the windows filling the space in between thus making the windows, headboard, and art one large rectangle. 

Low headboard
Design Solutions: A bed between two windows

This is a beautifully designed space, both elegant and simple at the same time.   The headboard  is low and the six art works fill the space nicely.  It is always interesting how you can depend on one element or principle  of design to  negate problems with another one.  With all the lines in the windows you might expect  that 6 pieces of artwork would be overkill in this space.  Not so here.  The dark frames and lines in the romans make the window lines almost unnoticeable. Contrast always wins when vying  for attention.  The curves in the spectacular roman shades also provide some relief from all the rectangles.  I rarely hang roman shades from the ceiling, but in this case it works especially well.

Curved headboard

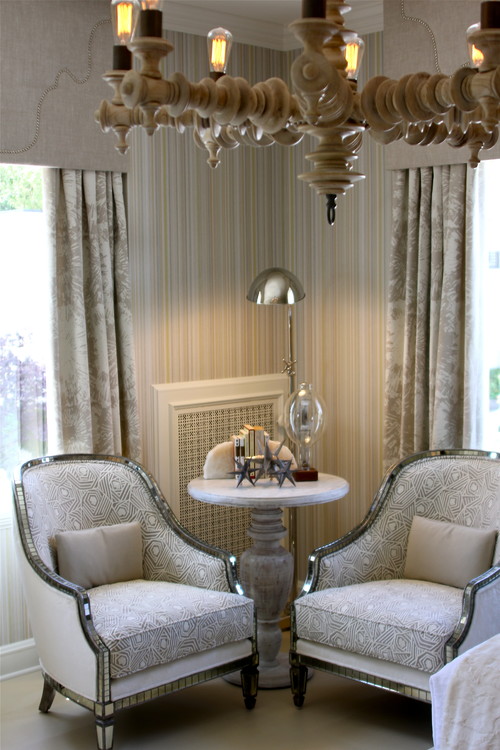
It is difficult to hang art over a curved headboard; it is often best to let the curves be the statement.  In this room a spectacular light fixture adds additional visual interest to the larger vignette.


And the exception to the rule... there's always one!  The lamps fill in the curves and the three pieces of art look especially good hung in a straight line.  It doesn't hurt that there is a circle in the headboard. The art is light and the bed becomes the center of interest in the room.


 Follow the lines of your curved headboard to place three pieces of art....


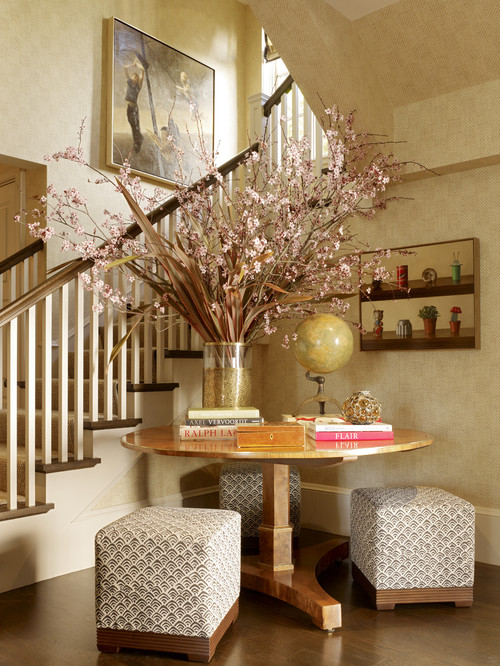
or use a round mirror or sculpture at the top of the curve.


Use window treatments to frame the bed


My preferred solution for a window treatment on matched windows is draperies.  They soften all the hard edges and make great frames for the bed and the night tables. Think about your table colour when choosing your drapes.  The tables should stand out not disappear. Yes, I would change the black, wrought iron rods! Love the simple pillow arrangement and circular mirror.


Consider using blinds behind draperies for privacy. and be adventurous when mixing designs  in the space. I think this combination works well because all the  patterns have the same colours.


Hanging a drape on the outside edge of both windows and using a shade of some sort is another option for a window treatment .  This solution opens up a small room and gives the bed more room to breathe.    The shades are the centre of interest in this room because they are so dark. Patterned fabric adds another element of interest.   I love  round night tables when there are two windows because they serve to soften all the straight lines.

If you want to maximize visual space keep your shades and drapes light and matching. Be careful when you choose rods for your window treatment.  Rods are functional and to my mind they should blend into the decor not make a statement that draws your eye upward. There's nothing else black in this whole room so why choose black rods? Check out a previous post on Choosing Rods.


Romans are simple and linear.  You would never call them soft, but they can frame a bed nicely when they are used in conjunction with tufted or other luxurious materials in a bedroom.  By choosing a simple monochromatic scheme these romans serve to move your eye around the room and allow the white window details to frame the bed.  The white art is a repetition of the the frames. 


 And why not make your window treatment the focal point in the room? Overload on draperies.


My parting comments:  This small  monochromatic space maximizes design in every way. If you want to put three art pieces above the bed it works best when there are soft draperies on either side.  The simple images and large white borders connect with the white bedding and lamps.  The larger white accessories are simple and perfect.   The dark furniture anchors the space and I don't even mind the black rods!

Links to all images can be found on my Pinterest board Bedrooms.
Powered by Blogger.